Step by Step Operating Instructions
Install the SkyEye2 application by double-clicking the 'Setup' icon.
The first time the program is launched on your computer, you'll be prompted to set a path location to save the image files in.
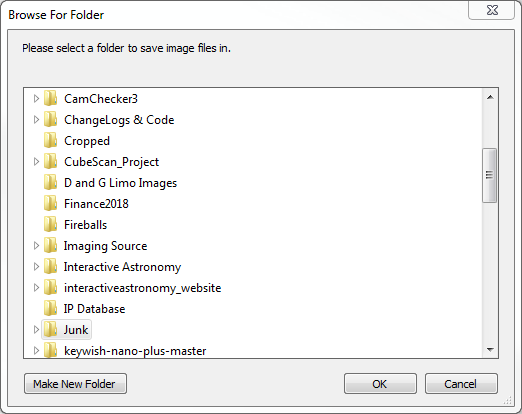
The image files can be saved anywhere you like on the local computer's hard drive. Do not attempt to save the images to
a network drive or NAS as this will cause the video rendering process to malfunction. After choosing an appropriate location to save the files in,
click the OK button to continue at which point the Main Gui will be displayed.
![]() Note: If you later choose to save the images in a different location, the location can be changed in the 'Program Settings' dialog.
Note: If you later choose to save the images in a different location, the location can be changed in the 'Program Settings' dialog.
Main GUI:
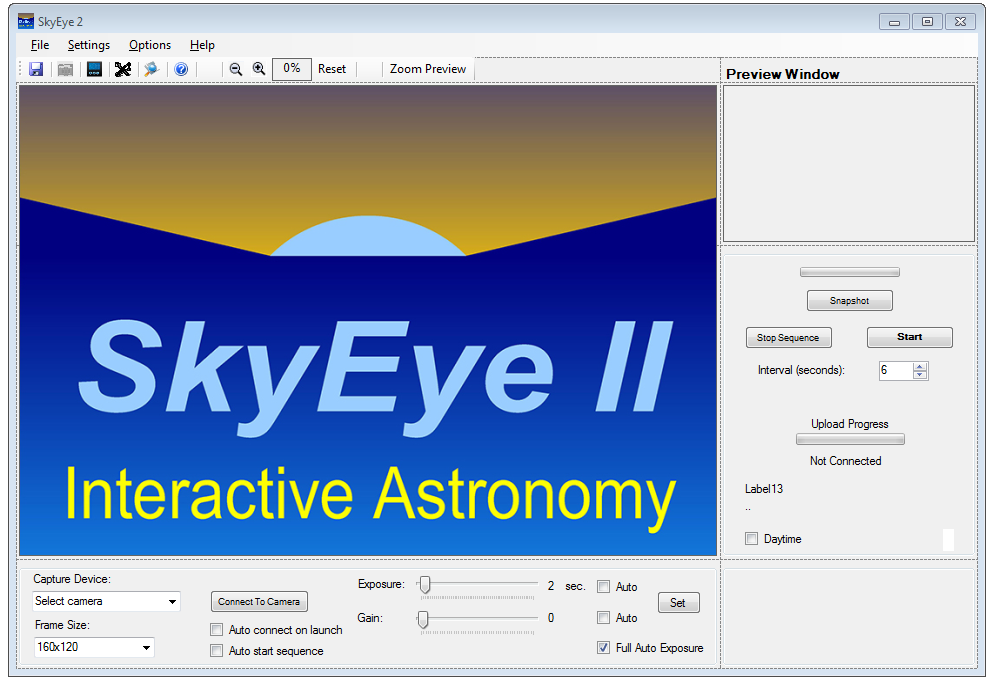
Select the appropriate 'Capture Device' from the drop down menu.
The "Capture Device" we'll be using for the SkyEye2 camera is 'DFM 37UX178-ML'
![]() Note: The SkyEye2 software is compatible with most USB cameras that support Microsoft Direct Show™ which includes most web cams and board cameras
Note: The SkyEye2 software is compatible with most USB cameras that support Microsoft Direct Show™ which includes most web cams and board cameras
on the market. However, not all of the functionality of the software will be available when using other cameras. For more information, see the topic 'Usage With Other Cameras'.
Use the 'Frame Size' drop down to select the frame size to be used. For best results, select the maximum value which is 3072x2048.
Click the adjacent 'Connect/Disconnect' button to connect the camera. In a few moments the 'Preview Window' will display the live video from the camera.
After successfully connecting to the camera at least once, you may tick the 'Auto connect on launch' check box which will automatically select the camera and connect it when the program starts.
Additionally, after all of the other settings have been made and the system is working correctly, the 'Auto start sequence' check box can be ticked which will start the imaging process when the program is launched.
From the top menu item drop down, select the 'Program Settings' item. A new dialog window will display showing the various settings options.
Program Settings
The settings items are grouped in boxes which are each relevant to a particular function. Now is a good time to set the various functions.

Image FIles Group
Starting at the top left group named "Image Files", the first entry is "Path to image files". You have already made this selection when the software was
launched but if you decide to later change the image file location, click the  button to open the file folder browser to select a new location.
![]() Note: Hovering the mouse cursor over a button will reveal the currently selected location.
Note: Hovering the mouse cursor over a button will reveal the currently selected location.
Optional: The next entry is the 'Path to placeholder image". If you would like to use a custom place holder image to be displayed and uploaded when the camera is idle,
click the adjacent button and browse to the file location of the desired image. Images must be in a standard image format (i.e. jpg, png, etc). Avoid using an excessively large image
file as this may cause bandwidth issues when uploading.
The next option titled 'Retain image files for "XX" days' determines how long the image files will remain on your hard drive before they are automatically deleted.
The image folders can become quite large, so be sure you have sufficient hard drive space if you decide to keep images for a longer period of time.
The default value of 3 days is usually okay, unless you have a specific need to keep the images on file longer.
Image Stamp Group
Each image can be stamped with relative data including date and time of acquisition, frame number, etc.
Tick the 'Date Stamp Image' check box to date stamp the acquired images.
The color of the date stamp can be changed by clicking the ![]() button which will open a color choice dialog. Select the desired color and the OK button.
button which will open a color choice dialog. Select the desired color and the OK button.
The 'Date Stamp Font Size' can be changed by using the adjacent drop down control.
Dark Frame Group
It's best practice to employ a "Dark Frame" method when using the SkyEye camera. A Dark Frame will remove excessive noise and hot pixels from the image.
To create a dark frame: In a darkened room, cover the camera with a heavy towel or blanket so that no ambient light can reach the camera.
The camera is very sensitive even at low light levels, so be sure that it is completely covered.
Click the 'Create Dark Frame' button and follow the message prompts to create a dark frame. (Approx. one minute)
When finished, be sure that the 'Subtract Dark Frame' check box is ticked.
Operation Mode Group
The software offers three unique modes of operation. The 'Nighttime Only' (or 'Sentinel Mode') will start imaging at Sunset and stop at Sunrise.
The 'Day/Night' mode will run the camera continuously.
The 'Day Time Only' mode will run the sequence from Sunrise to Sunset.
Dusk/Dawn Settings Group
Type your current GPS location coordinates in the appropriate fields. If you are unsure or cannot look the coordinates up, click the 'Fetch' button
and the program will look up the approximate coordinates of your current location.If your location observes Daylight Savings time and DST is valid,
tick the 'Use DST' check box. Otherwise, leave this box unchecked.
The Start and Stop number offsets will set the number of minutes before or after Sunset and Sunrise that the imaging process occurs.
These can be adjusted as you prefer.
FTP Settings Group
To upload images and videos to a web host, fill out the appropriate fields in the FTP settings group.
Hostname would be the name or IP address of the hosting service (ex. yahoo.com or 67.195.1.92)
Username would be the user name assigned to you by the hosting service.
Password would be the password assigned by the hosting service.
Leave the Host Path field blank as this will be populated by the program.
Click the 'Connect' button to log in to the web host. In a few moments, a new dialog window (shown below) should appear displaying the
names and types of files already residing on the server.

Select the existing file name from the list or type in the name you would like the uploaded file titled. The default name is "skyeye" and is the file name to use if you are planning
on uploading images and videos to the interactiveastronomy.com web site. (only type in a filename, the filename extension is not needed.)
Currently, only the .jpg format is supported for uploading images.
After you have entered the name of the file, click the 'Save" button to continue.
For more information regarding usage of the FTP manager dialog, refer to the FTP Dialog topic.
After you have successfully connected to the web host and set the upload filename, tick the 'Upload images and videos' checkbox.
At this point you may (optionally) tick the 'Auto connect on program launch' check box which will automatically connect to the same host
in the future each time the program is launched.
Video Settings Group
Two separate, unique types of videos are available to be created by the SkyEye2 program.
The 'Interval' movie is a movie that can be created for a specific time interval.
For example, setting the Interval rate to 15 minutes will cause the software to create a new Interval movie every 15 minutes.
Each time a new Interval movie is created, it overwrites the existing one so that the Interval movie always contains the most recent
image frames.The frame count is the number of frames that the movie will consist of and the Frame Rate is the number of frames per second
that the movie will be rendered in.
The "Night Time movie operates in a similar fashion, with the exception of the time-line and number of frames.
The "Night Time" movie can only be created when the software is in the 'Sentinel Mode".
When the software goes in to the "Pause" mode at Sunrise, the all night movie is created and contains all of the captured frames from
sunset to sunrise.