FTP Dialog
FTP settings (in Program Settings)
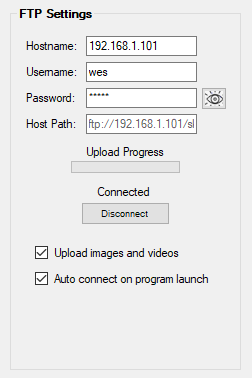
Type in the appropriate information in the "FTP Settings" group box fields and then click the 'Connect/Disconnect' button.
If a message appears stating "Check Credentials", ensure that all the information is correct and there are no typos.
After filling out the fields, click the "Connect/Disconnect" button.
![]() Note: The "Host Path" field should be left as-is. This will be populated by the SkyEye2 program after the program has connected to the web host.
Note: The "Host Path" field should be left as-is. This will be populated by the SkyEye2 program after the program has connected to the web host.
![]() Note: Use the
Note: Use the  button to toggle the password to display as text.
When the connection is made, a new FTP browser dialog will appear as shown below.
In the 'Filename' field, type the name you would like to use for the uploaded image file.
If the file is already displayed in the FTP browser, then click on the file name.
Click the 'Save' button when finished.
If you are planning on uploading images and videos to the Interactive Astronomy web site, use the default name 'skyeye'.
There is no need to type in the file extension as this will be automatically added by the program.
![]() Note: As of this writing, only the.jpg image file format is supported.
Note: As of this writing, only the.jpg image file format is supported.
FTP browser dialog:
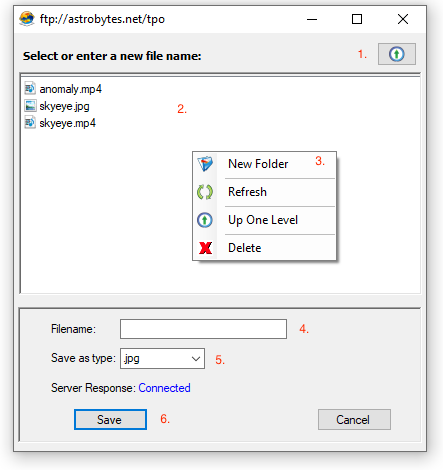
Besides setting the name of the file to be uploaded, the FTP browser has additional features.
![]() Right click anywhere in the Host File List Window to display the Options Menu.
Right click anywhere in the Host File List Window to display the Options Menu.
- "Up" Arrow Button- Moves up the file hierarchy of the of the host file structure.
- Host File List Window- Displays the contents of the currently selected host folder.
- Options Menu- Various file manipulation tools (Self-explanatory).
- Filename Field- Type the desired file name here or select an existing file name from the list by double-clicking it.
- File Format Drop Down- Selects the image file name (Currently, only .jpg file types are supported).
- Save Button- Saves the selection and closes the dialog window.
7. Cancel button- Cancels current operation and dismisses the FTP dialog window.